We have decided that this post should be about the father of all SEO plugins and that is none other than Yoast SEO or better known as “WordPress SEO by Yoast”. For those who do not know this plugin is like not knowing the seven great houses of Game of Thrones, that is a serious mistake, because it is undoubtedly one of the most complete plugins with which to perform the work of SEO in WordPress.
With this article we will show you how to install and configure this plugin, which if anything stands out from the rest is for the wide range of possibilities offered and the improvement it offers in the SEO On-page for our website. In short, a diamond in the rough to which we can get a lot of performance.
WordPress SEO by Yoast features
Some of the main features of this plugin are:
- Modification of title and meta description in each entry, one by one or through patterns for the whole website.
- Optimize the content of each article based on a keyword.
- It allows to verify our website in Bing Webmaster Tools, Google Webmaster tools and Yandex administrator tools.
- Preview of the title and description as it would appear in Google.
- Meta Robots configuration.
- Use noindex, follow and nofollow in posts, pages, taxonomies and custom post types.
- Add the canonical attribute to taxonomy files, individual posts and pages, and on the home page.
- Support for Breadcrumbs, with configurable titles.
- XML Sitemap of pages and images. You can configure not to include certain types of entries and taxonomies and mark the pages you do not want to index in the XML sitemap.
- .htaccess and robots.txt editor
- WordPress SEO by Yoast: How to install it
In case you did not know, this plugin is totally free, and we can download it directly and very easily from the list of wordpress plugins. When we proceed to download it gives us the option to add some premium features but from our point of view with the default settings is more than enough to initially optimize any SEO project we have in hand.
In case we want to install it from our wordpress we will have to do the following steps:
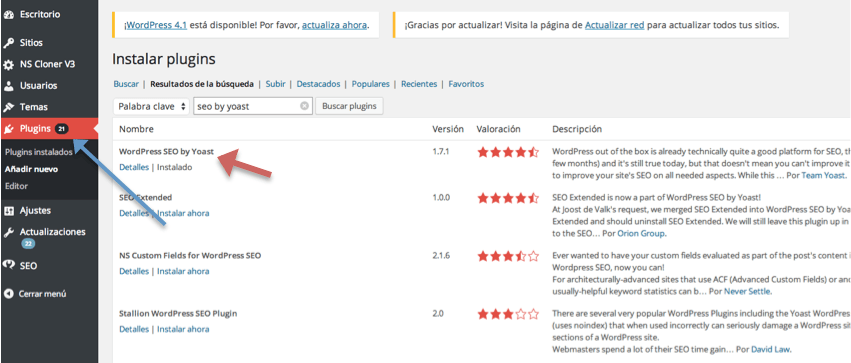
We go to the “plugins” tab and then insert the name of the plugin and click on “search plugins”. It will appear in this case the WordPress SEO by Yoast. Then we click on install (in our case we already have it installed), once installed we only have to configure it.
SEO by Yoast configuration
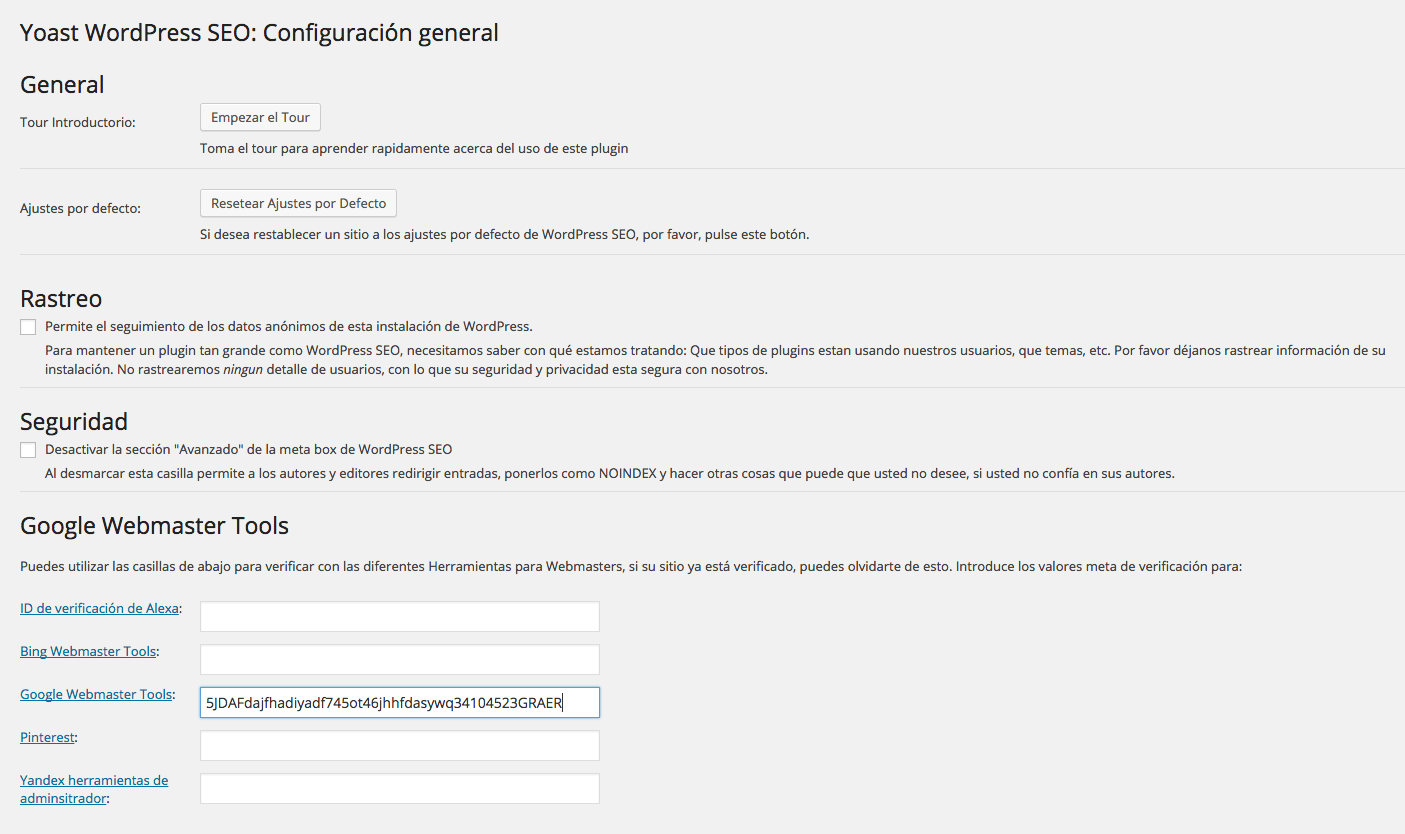
Once we have accessed the plugin, the first window we have to access as a first contact is Control Panel, from where we can take a tour with the aim of knowing quickly the use of SEO by Yoast and, in case of detecting any incident, restore all settings to return to the default settings of the plugin.
If we enable the Tracking checkbox what we are doing is helping the developers of the plugin to continue improving it for other plugins that have the same functionality.


Finally, the webmaster tools box gives us the possibility to “perform” the verification of our site in several tools. For example, in Google Webmaster Tools, when we register our account, we have to verify the ownership of our website, that is, prove that the site is ours. To do this we can enter the code as shown in the image below and we can validate it without having to touch the theme of our wordpress.
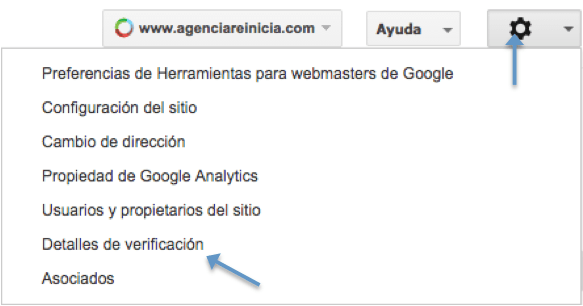
To obtain this code you will have to go to your webmaster tools, click on the account you have registered and in the site panel go to the icon that appears on the top right in the form of a “nut”. “nut” icon on the top right hand sidedrop down the menu and click on verification details. Inside details we will obtain the code that we will insert in the wordpress as it appears in the image above.
Titles and meta tags – Yoast WordPress SEO
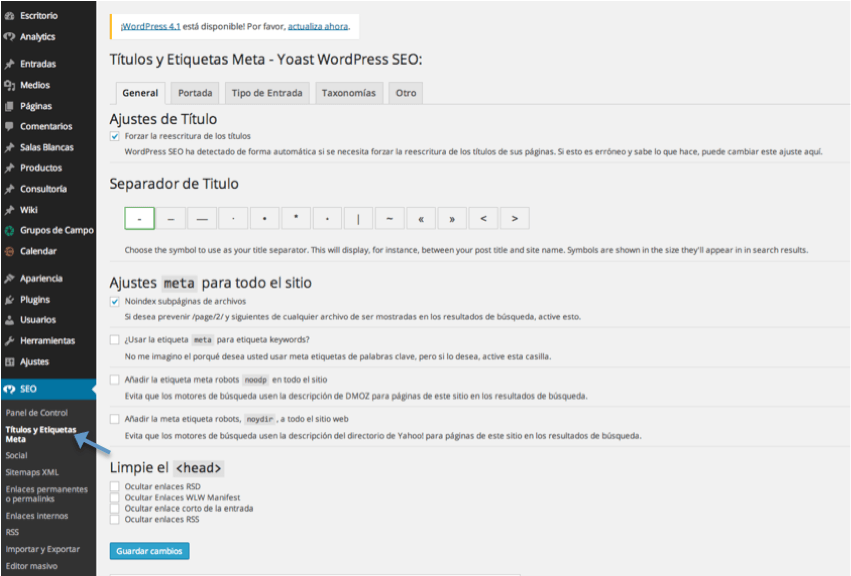
The next menu option is the Titles and Target Tags menu option. It consists of 5 tabs which are:
– General: the two most relevant aspects we have to take into account are: title setting and site-wide meta settings. By checking the title setting box what we tell the plugin is that it has control over the metadata of our website. On the other hand, in meta settings for the whole site, what we do is to insert the meta tag of no index in the archive pages with what we tell Google that there are pages that it does not have to index to avoid the so known as duplicate content.
– Home page: from this tab we can determine the title and description for our home page.
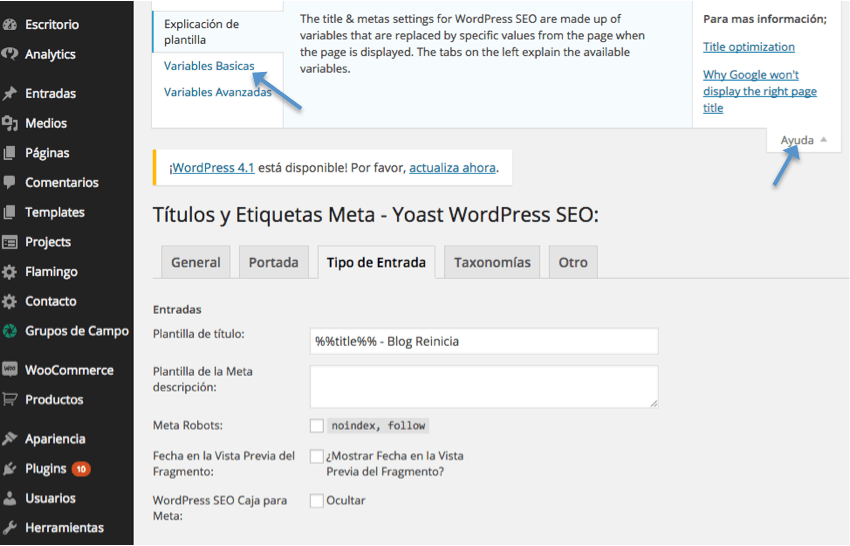
– Type of entry: In this section we can configure general patterns with which the titles and meta descriptions of ALL the pages of the web will be generated, defining it for each type of entry that you have configured. In the Title Template field we will put the title we want our entry to have by default and the same happens with the meta description template. The other 3 checks should be unchecked, so that by default all the information is indexed. Next we show you an example of how it would look with the variables that we have defined for one of our sites. 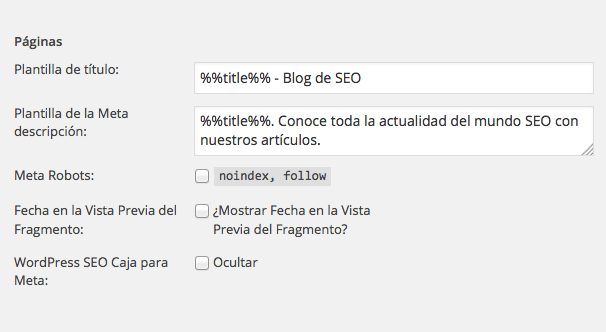 But you will wonder where we have taken %%title%%%, because we are going to tell you where these variables come from. Once inside the section, click on the button at the top right that says “Help” as shown in the following image and we will see all the available codes.
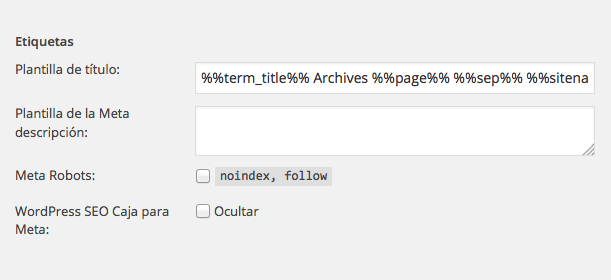
– Taxonomies: this tab contains the rest of the primary element types of our site such as categories, tags, formats, wiki, etc. As in type of entries we can define by means of variables the title and the meta description. Next we show you an example of how we have defined this tag.
– Other: in this tab, settings for items that are not in the previous tabs, such as author files, files by search and not found.
Social
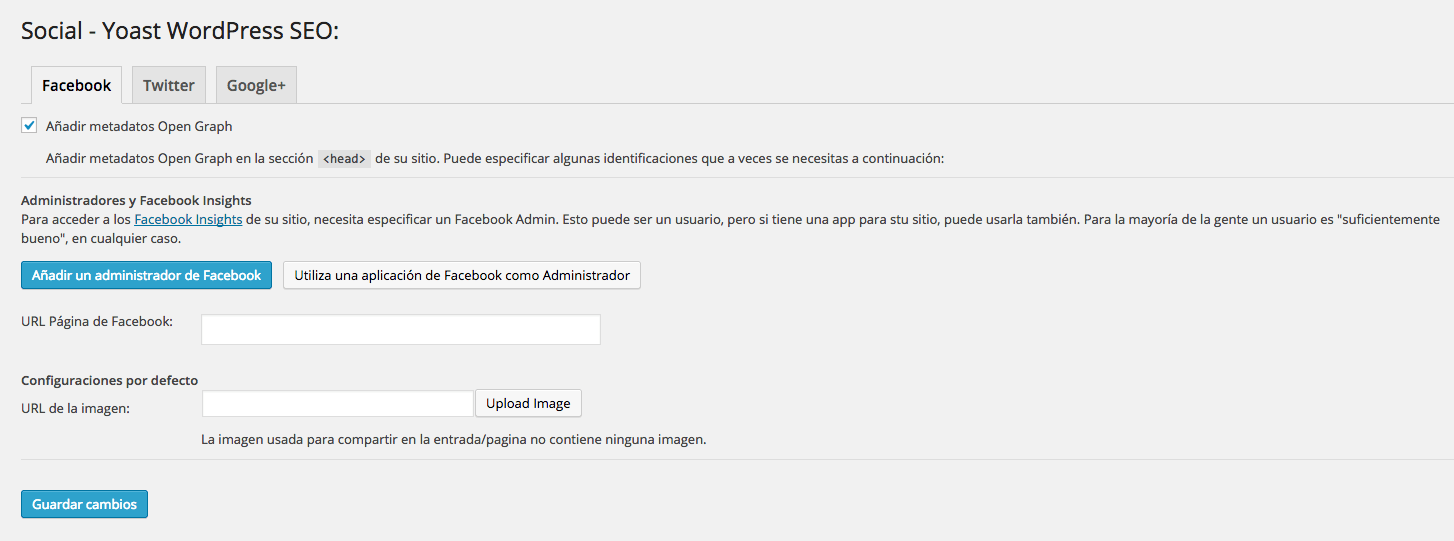
Social networks have an increasingly greater weight in SEO, so from this plugin allows us to carry out a quick and easy configuration of some issues that could be beneficial to the site. From this tab we can define the way in which we want users to share content on Facebook, Twitter and Google+. In this way, we will be able to suggest texts that will appear when people who share a page of our site paste the URL in any of these networks.
- By selecting the Open Graph checkbox, what we get is that webmaster tools inserts the code and includes the necessary meta tags and thus the information can be shared correctly through Facebook.
- Facebook Insights Administrators: this option gives us the opportunity to link Facebook statistics with our site.
- Facebook page url: if we have a Facebook account and we are interested in promoting it we should insert the url of our facebook account to give it even more of a boost.
- Default configuration: by checking this box what we tell Facebook is that in case our publication in the network does not have an image, what is the image they have to use.
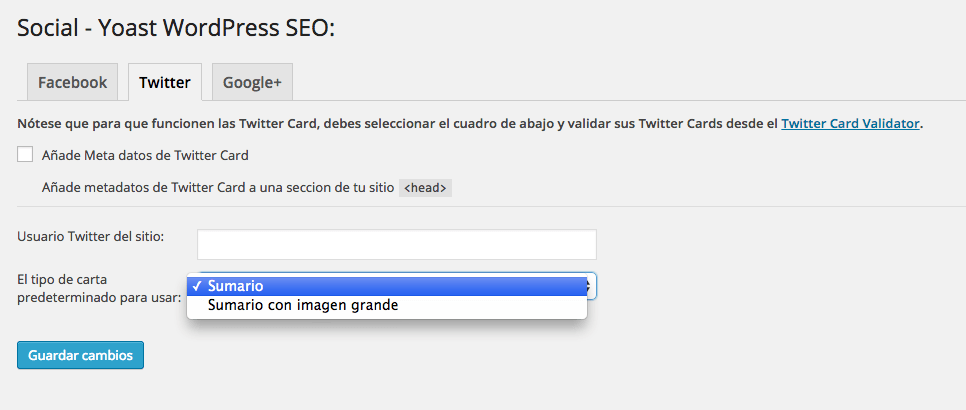
In the case of Twitter, the functionality is very similar to Facebook.
Twitter Card Meta data: for those who do not know a Twitter Card is all the information that appears when we publish tweets. Selecting this option what we are getting is that in each tweet that we publish appears an information that has been previously approved by introducing our user name that we have inserted in the box Twitter User of the site and then having selected one of the two options that give us in the box Default type of card to use, the two options that gives us this box are:
Summary: if we select this option what will appear is a title, description, author and a thumbnail image below our tweets.
Summary with large image: if we set the option with large image, what we will get is that we will add an image in that size, after all both options are oriented to add our authorship to our tweets.
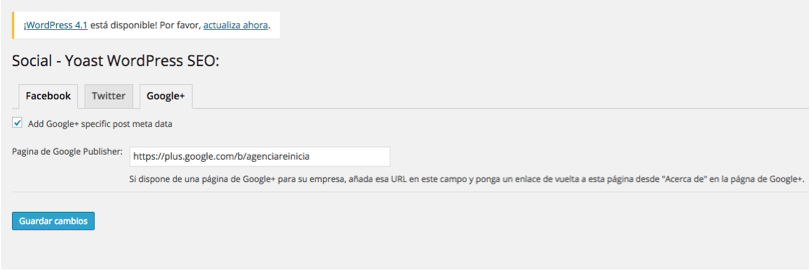
Google+
As in Facebook and Twitter, the utility of Google+ is to give authorship to the publications that we make in our Google+ profile, for this we must check the first box and then add the url of our profile either the profile of our company or our own profile. In our case we have decided to add as shown in the image below the profile of Agencia Reinicia so that the publications that are made from that profile will be authored by Agencia Reinicia.
WordPress SEO by Yoast – Sitemap XML
By now we should all know what an xml sitemap is, but for those who do not know, it is an xml file that contains all the urls of our site and in which we tell Google which are the urls that we want to index, even being able to set priority between urls. From our point of view this section is one of the most important that the plugin by Yoast can offer us. From here we can configure what information from our site to include and exclude in the different sitemaps that we generate, both pages and images, and send them automatically so that Google, Bing, Yahoo or Ask understand how our website is structured and index all the new content that we create and upload. However, it is important to know that sitemaps are NOT mandatory for search engines, but they are a suggestion that they will decide whether or not to follow.
The clear example of this is that in Google Webmaster Tools we can find differences between submitted URLs and indexed URLs.
Permalinks – Yoast WordPress SEO
In this section we have two configuration options: Permalinks configuration and canonical configuration.
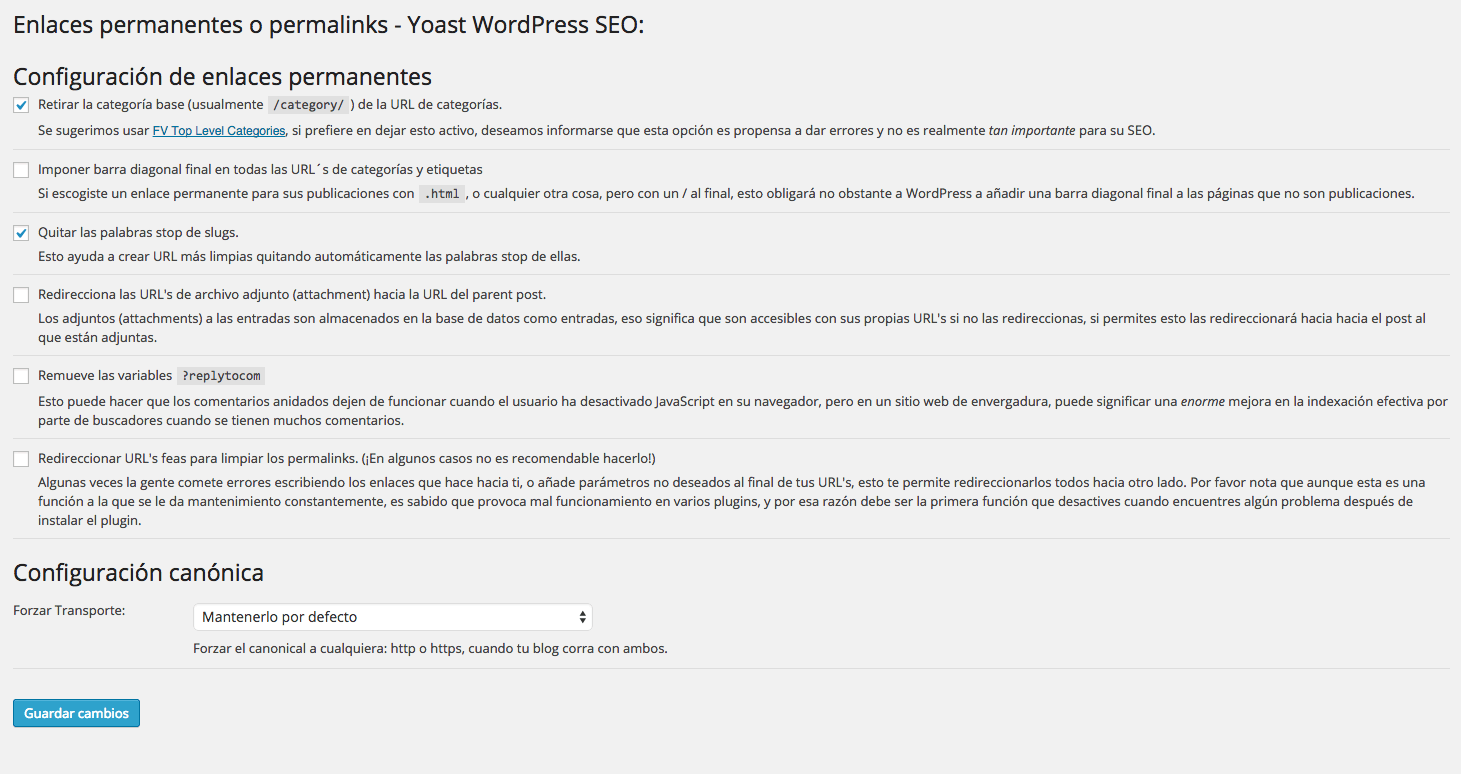
In the permalinks configuration you have the following checkboxes:
- The first checkbox allows us to remove the base category (usually “/category/”) from the URL of categories, by checking this box what we get is to remove the base category from the url of the categories of the blog that WordPress puts by default. We usually do it to shorten URLs.
- Impose trailing slash on all category and tag URL’s: If we choose a permalink for our posts with
.html, or anything else, but with a / at the end, this will force WordPress to add a trailing slash to pages that are not posts. - Remove stop words from slugs: selecting this option will help us to create clean urls without the famous stop words. Next we show you what is a url with stop word and a clean url. Url with stop words:
http//new.agenciareinicia.com/servicios-de-consultoria-para-empresasclean url would be:http//new.agenciareinicia.com/servicios-consultoria-empresas. - Redirect attachment URL’s to the parent post URL: this option is recommended to be checked because the attachments to the posts are stored in the database as posts, being accessible with their own URL’s if you do not redirect them, if you allow this it will redirect them to the post to which they are attached.
In the canonical configuration we have three options which are to keep it by default, force http and force https, with the tag rel=”canonical” we indicate to Google which is the preferred version within a group of pages that have the same content. One of the last factors introduced by Google in its algorithm is to positively value those pages that are hosted on secure servers and that transmit data under these security parameters. Therefore, if we have contracted the “https”, we recommend forcing the “canonical” to https.