Google Analytics is Google’s web analytics tool. With this tool we will obtain data about the behavior of our users on our website, specifically, we will have the grouped information of the traffic that arrives according to the audience [visitor information], the acquisition [where the traffic comes from], the behavior [what they do on our page] and the conversions [what business results they produce].
After a brief introduction of what Google Analytics is, we will give you some basic guidelines to configure the tool and try to get the most out of it.
Google Analytics Configuration
1. Create an account
Creating a Google Analytics account is very simple. To do so, the first thing you need to do is to have a Gmail account.
Steps to follow to create your Google Analytics account:
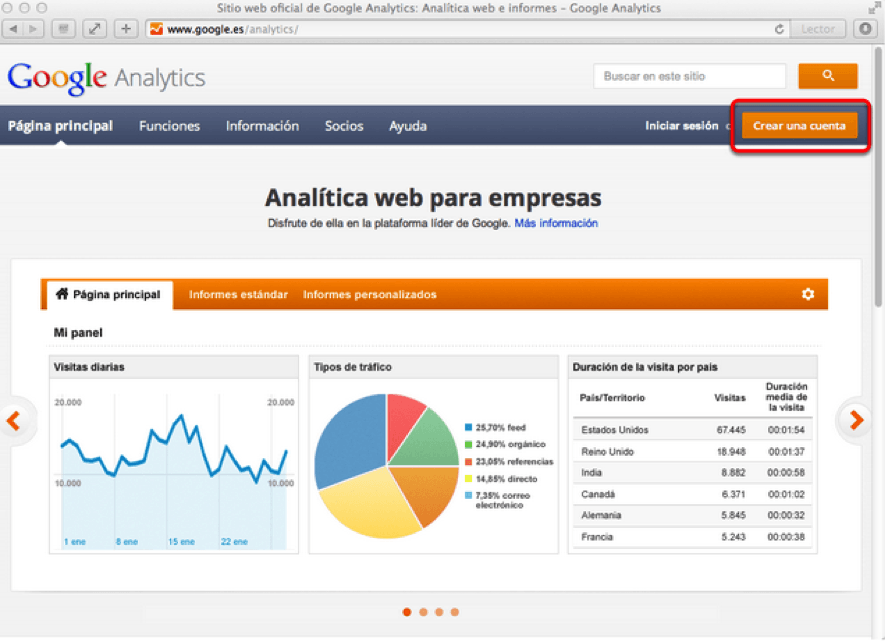
1- Go to the Analytics registration page: https://www.google.com/intl/es/analytics/, and click on the “Create an account” button.
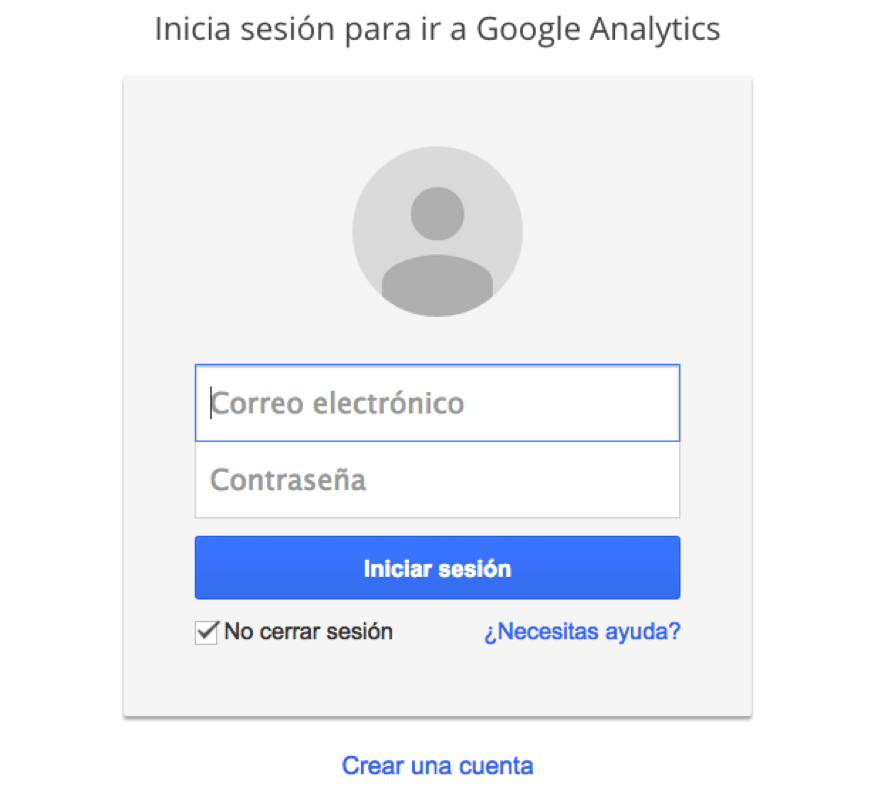
2- Next you will start with the registration process. You will have to enter your Gmail account information that you have created or had:
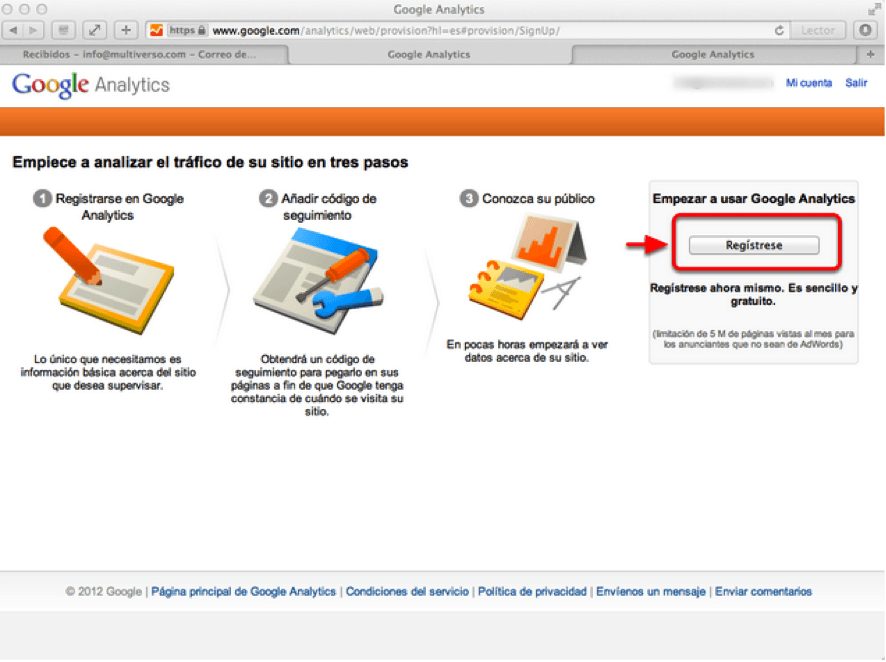
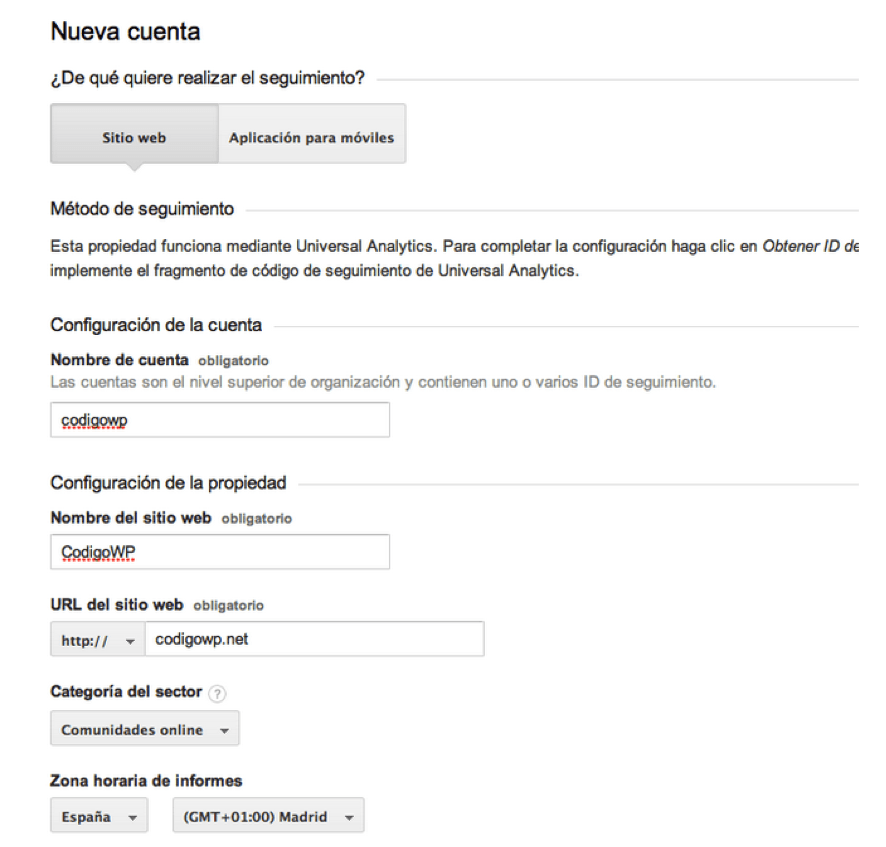
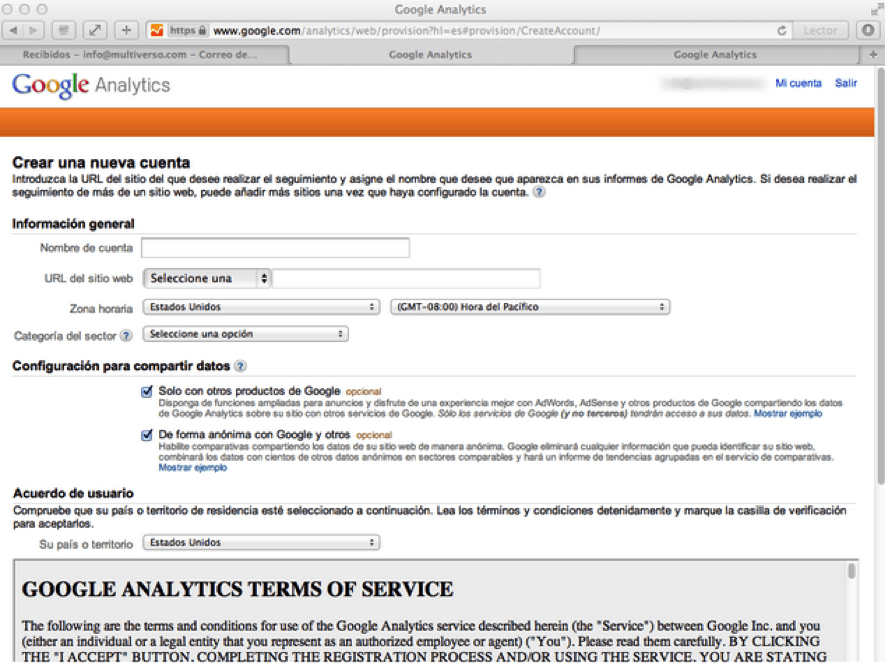
3- In the next step you will see the Google Analytics registration panel and the configuration of your account:
4- Completion and creation of the account:
2. Obtain and implement the tracking code
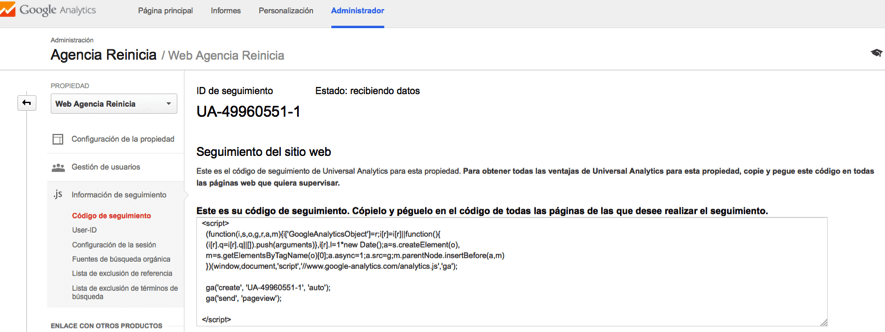
Once you have created your Analytics account, you will need to enter a piece of code into the html of all your website pages that you want to track. This code will appear to you once you create the account, but you can locate it within the “Administration” tab, “Tracking Information” section, by selecting the “Tracking Code” section.
Check that the tracking code is working correctly
Once you have inserted the tracking code in all the pages of your website, if you want to check if it has been implemented correctly and if you are receiving statistical data about the interaction of our users, you can do it by going to the “Administration” tab, within the “Tracking information” link, selecting the “Tracking code” section, and looking next to our UA code at the status. If it says “receiving data”, it means that data will be displayed in your account.

3. Account permissions management
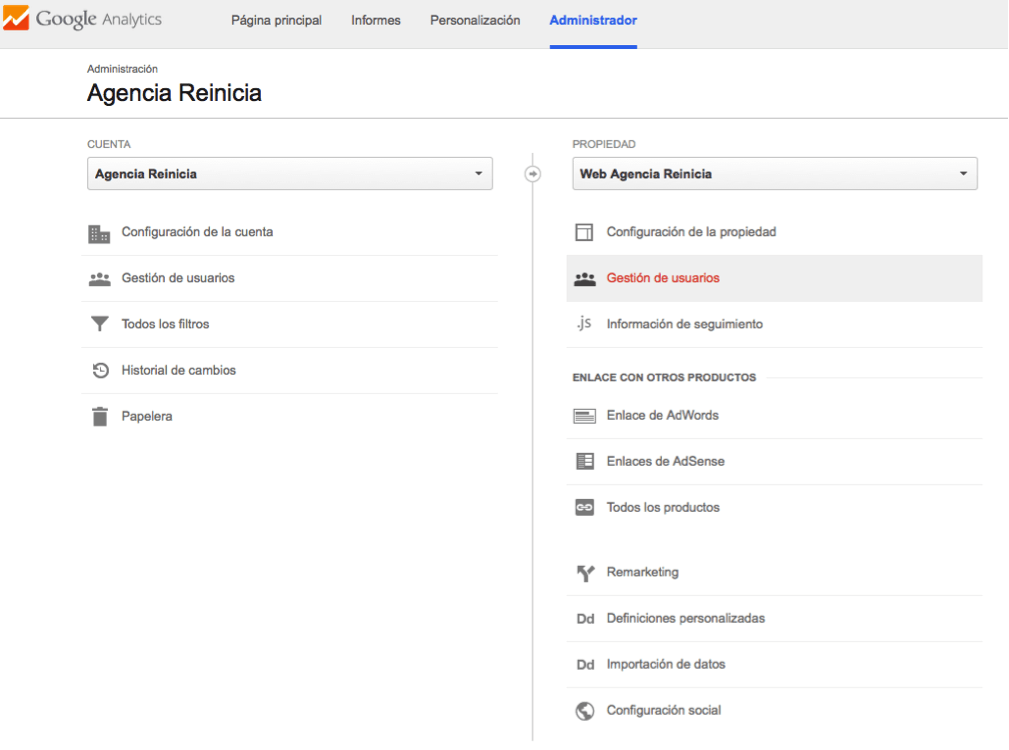
From the Administration panel of your account you can manage the users that you want to have access and the permissions of each one of them:
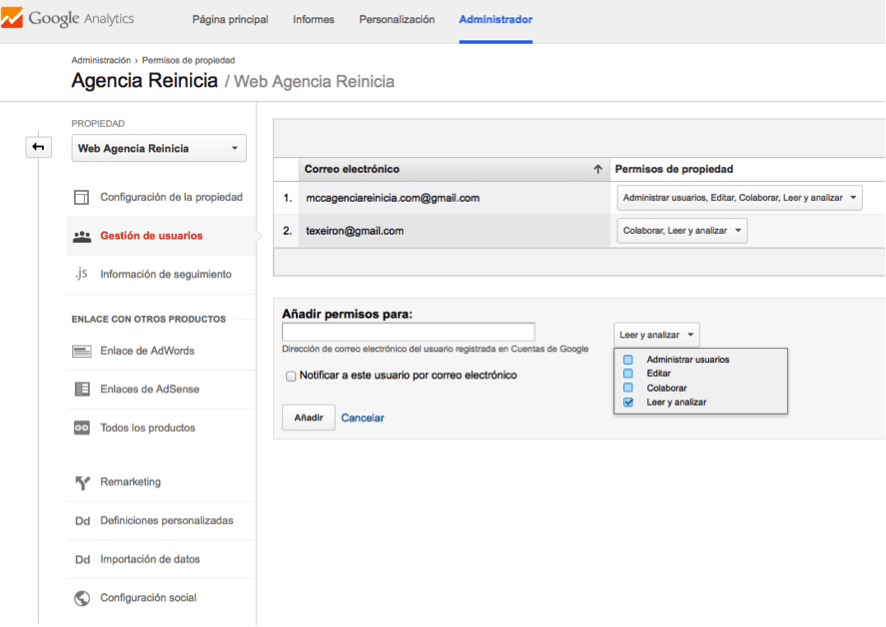
By simply entering the user’s email address, assigning the type of permissions you need them to have and clicking “Add”, you will be adding the user.
The permission types are as follows:
- Read and analyze: display of reports and data. You will not be able to enter the shared elements.
- Collaborate: you will be able to create items from the account (e.g. a dashboard) and share it as well as participate in other shared items. Includes read and analysis permissions.
- Edit: with this type of permission the user can perform actions such as: add/edit/delete accounts, web properties, profiles, define objectives, view reports…. but not manage users. This user contains the “collaborate” permissions.
- Manage users: user management. Includes all of the above permissions.
To delete users simply select the email of the user you want to delete, and click on the delete button. To perform this action you must be logged in as the “administrator” user of the account.
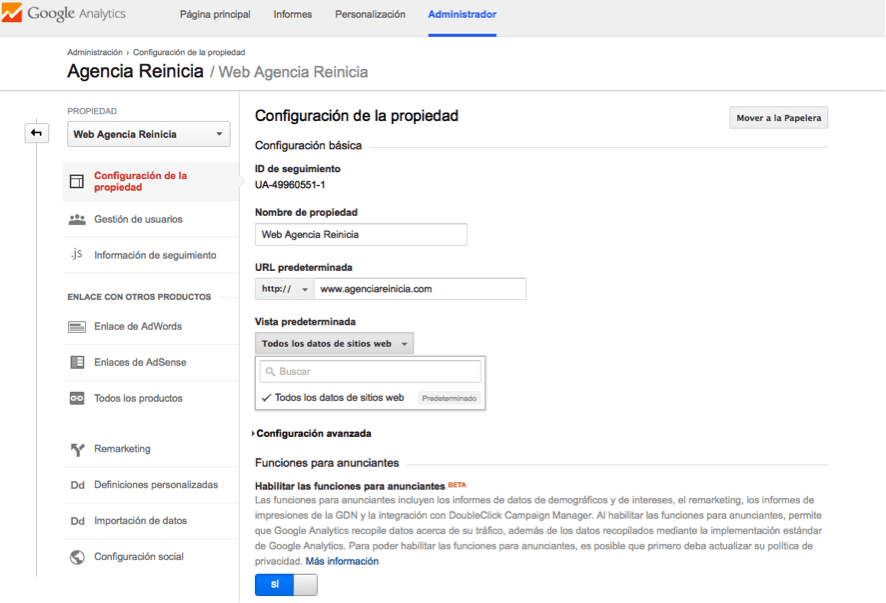
4. Indicate default view
A view is a collection of statistical data collected by Google Analytics from a website or application with corresponding reports. By default, Google Analytics creates a master view with all unfiltered data, but you can create views with filtered data, for example, for users accessing from a specific geographic region. That is, they are used to create specific data visualizations and to be able to see only the information you need or want to follow and/or see.
To choose a specific view for your account, simply access the administration panel, select property settings, and click on the default view drop-down.
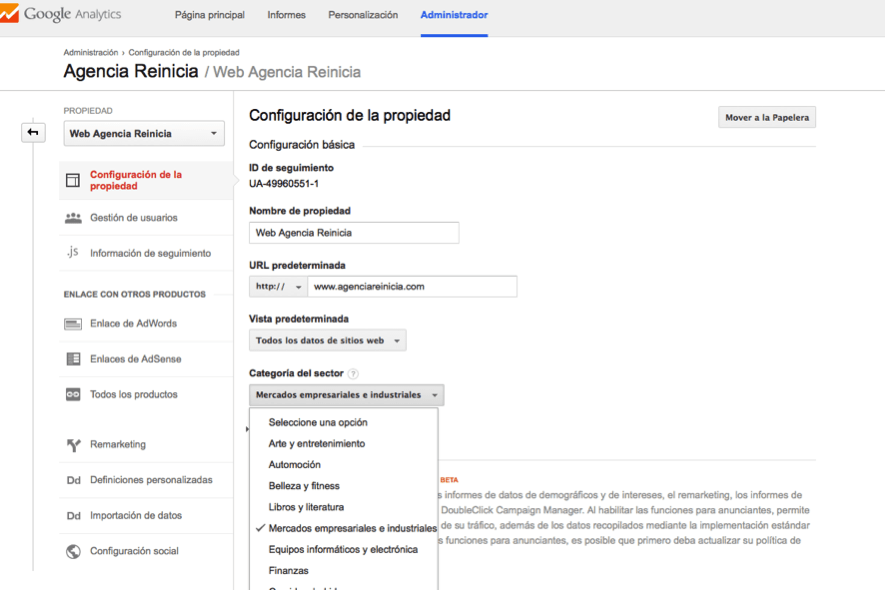
5. Indicate sector category
As in the previous case, to configure this aspect, you must go to the administration panel, select property configuration, and click on the sector category drop-down. Once here, select the sector most related to your company or your site’s profile. This data is used by Google to show better industry statistics for traffic forecasting, benchmarking and other information.
6. Socio-demographic data configuration
With socio-demographic data [gender, age and interests] we will be able to get to know our website visitors better. With this information, we will be able to better adapt the contents of our website, the remarketing campaigns you have to set up, relevant content and audience for E-Mail Marketing campaigns, and other advertising campaigns for example.
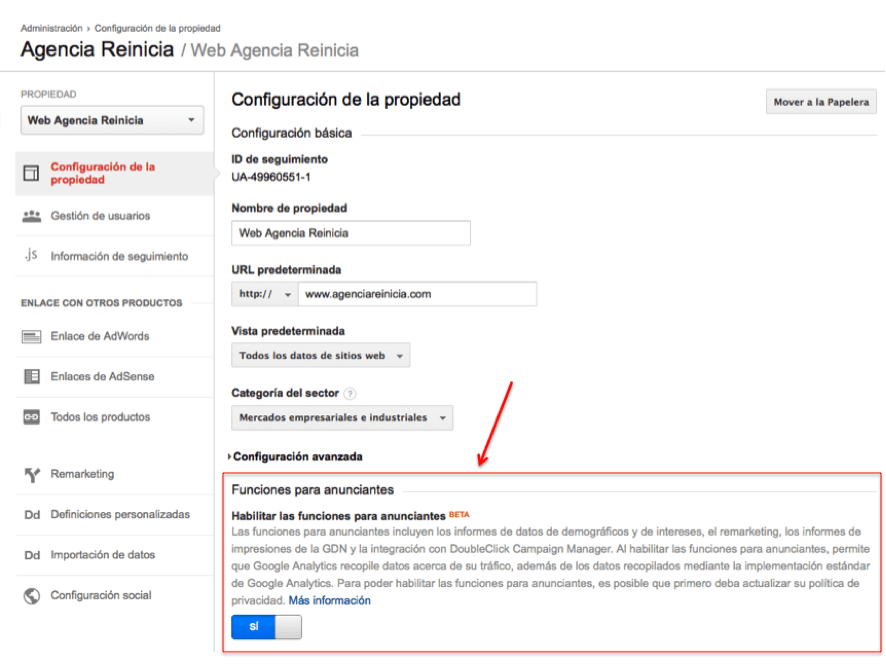
To enable socio-demographic data to be displayed in Google Analytics reports, you will first need to upgrade your account to support advertiser features. To do so, you will need to follow the steps below:
1- Modify the property’s configuration: Access the property’s configuration panel and select “Yes” in the “Enable functions for advertisers” section of the advanced configuration – Functions for advertisers.
2- Modify the tracking code: to do this you will have to follow different steps to change the code depending on the version of the code you are using:
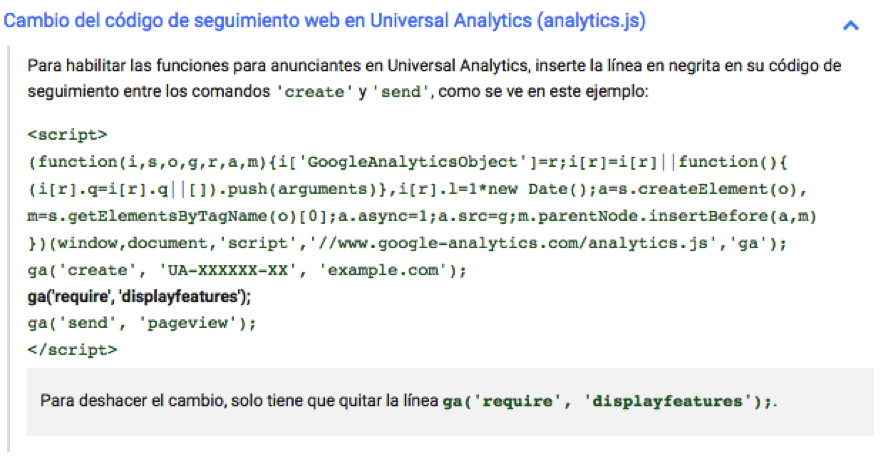
- Change of the web tracking code in Universal Analytics (analytics.js). In bold the code to add.
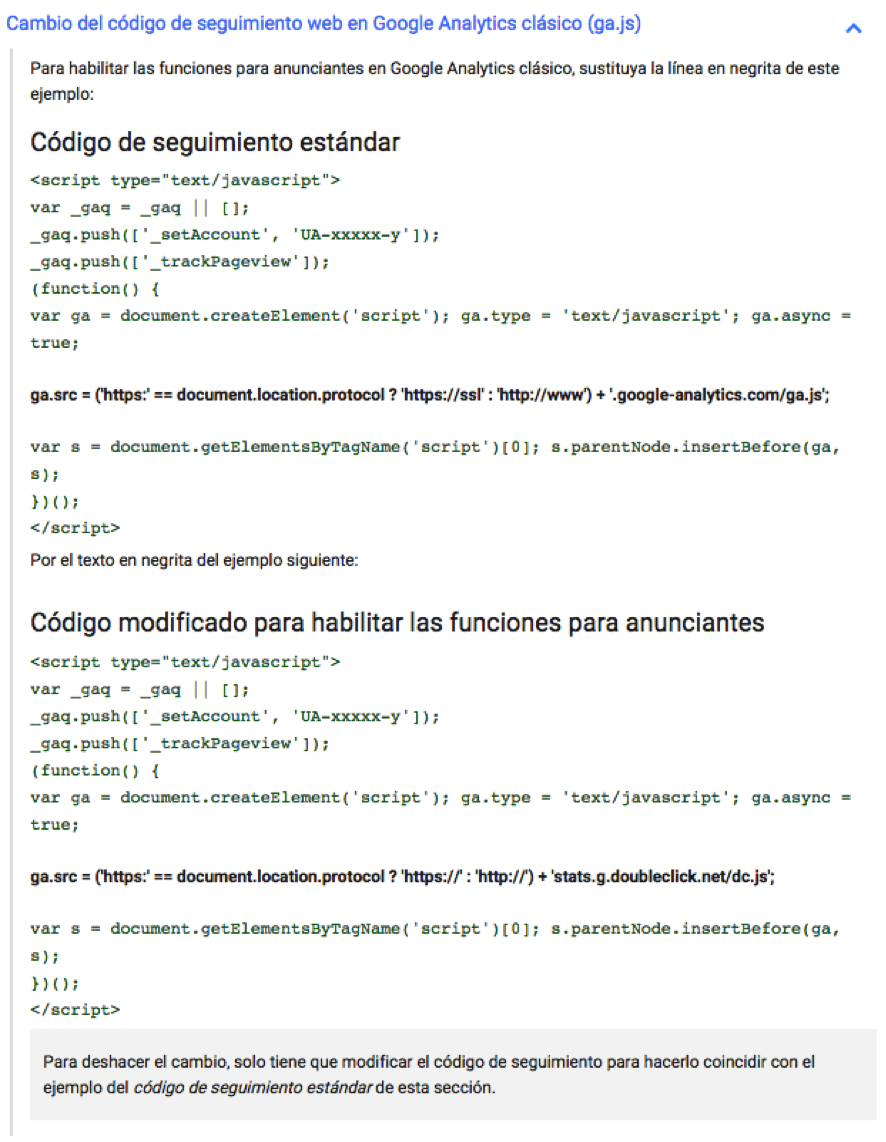
- Change of the web tracking code in Google Analytics classic (ga.js). In bold the code to add.
You can get more information about this by going to Google’s support page: Google Analytics Support
7. Enable enhanced link attribution
What is Enhanced Link Attribution for: this feature will allow you to track links on your website in a unique and differentiated way, so that you can know which specific links users click on when browsing your website.
For example, it may happen that on one page of your website you have links that go to the same page (different contact buttons, for example); well, with this attribution you will be able to consult the data of these links independently from each page, great isn’t it? But there’s more, when an element of a page can take you to different landing pages (for example the results of the search box of your website), you can track these links individually, as well as track buttons, menus and actions executed by JavaScript.
What do I do to enable enhanced link attribution in Google Analytics? Don’t worry, here we explain it to you:
-
- Access the administration panel and select property settings.
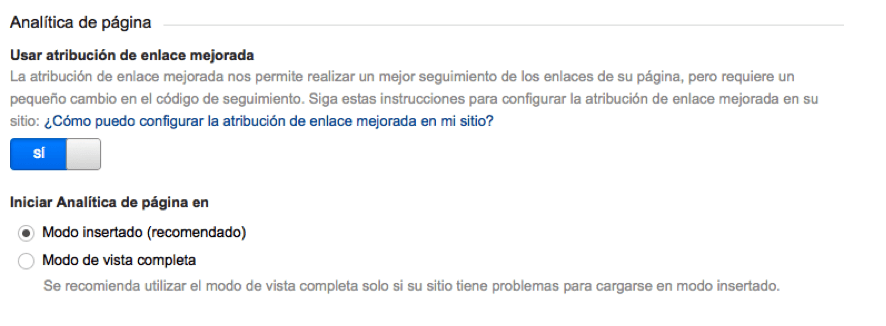
- Enable the Use Enhanced Link Attribution option (leave the option recommended by Google) within the Page Analytics section.
-
- To make it work correctly we will have to modify our tracking code:
-
- Modification of the code for analytics.js. We will have to add the code shown in red:

-
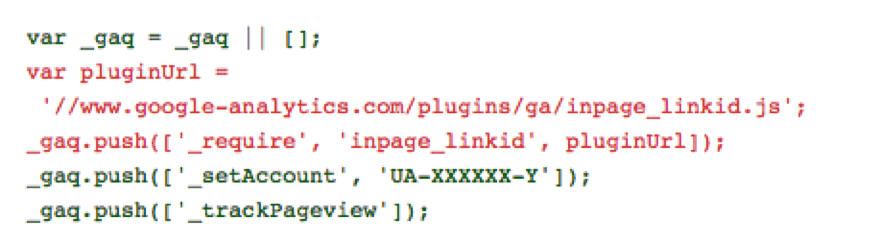
- Modification of the code for ga.js. We will have to add the code shown in red:
8. Link to Webmaster Tools
This tool is a service that Google makes available to website administrators to monitor, optimize and maintain the presence of these sites in Google’s organic results. It allows you to receive information about how Google sees your website. This will be very relevant for you to make a correct follow-up of the possible evolution of the positioning of your site in the search engine. You can learn more about Webmaster tools in the article by our colleague Nestor Tejero: What is Google Webmaster Tools and what is it for?
Linking Webmaster tools with G.A is very simple. By performing this action you will be able to synchronize the data from your Google Webmaster Tools account with Google Analytics, and thus be able to make better decisions based on them. It will take two steps to link both accounts:
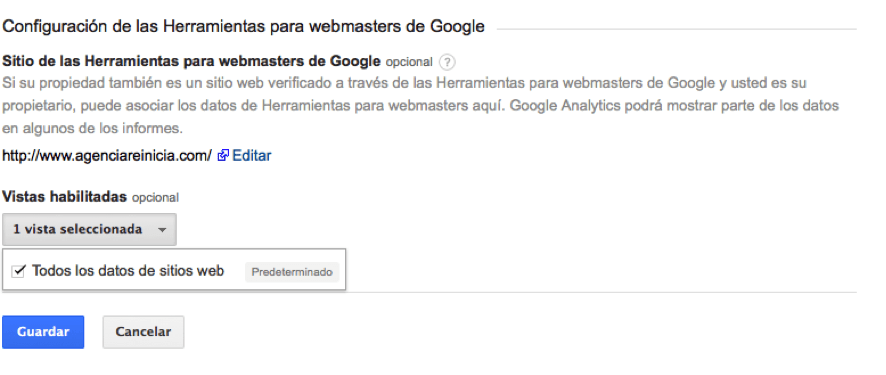
1- We associate the property of our Google Analytics with Webmaster Tools: for it, and having created both accounts with the same email address of gmail, we must first go to the access of our Webmaster Tools (the little wheel or nut of the top right part), click and in the drop-down click property of Google Analytics. Once inside we will have to select the name that we have assigned to the account of Analytics and domain of our Web that we want to associate (in our case www.agenciareinicia.com).


2- Link the accounts from Google Analytics: to do this, as we have done in the previous points, we must access the administration panel, select property settings, then go down to the section that is called as Google Webmaster Tools Settings, once here enable our view.
9. Linking Google Adwords accounts
This point, like the previous one, is important to have all the data synchronized in the same tool for analysis, and thus be able to draw conclusions on the actions to be taken.
To link our Google Adwords accounts with Analytics you must follow the steps below:
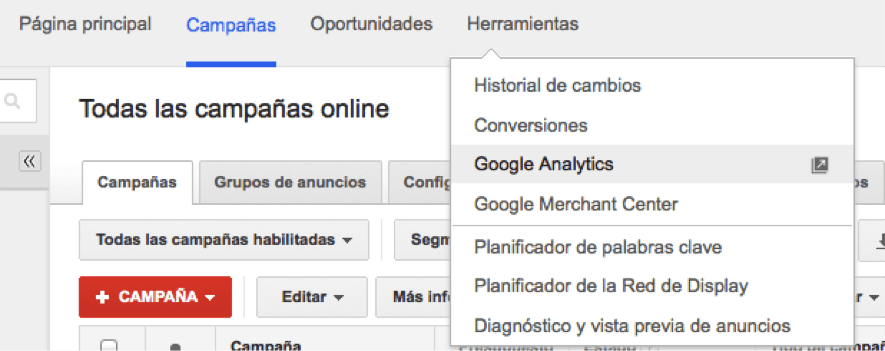
1- Within our Google Adwords account, and from the main menu, we must access Tools > Google Analytics:
 .
.
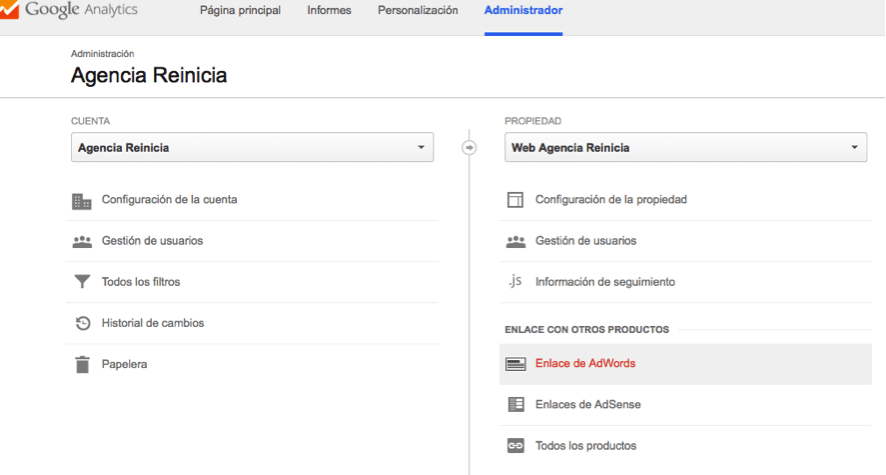
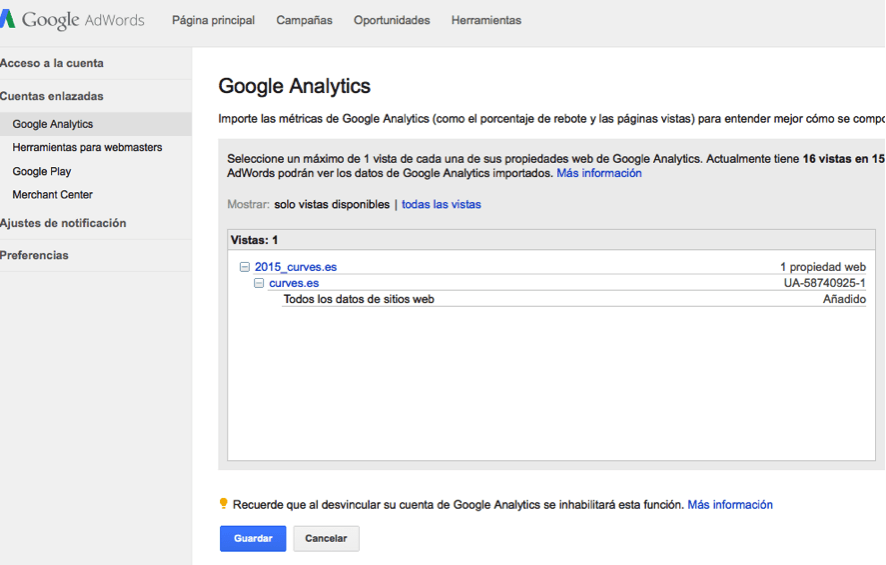
2- Once this is done, we will be redirected to our Google Analytics account. From here, we will have to navigate to the Administrator panel, under Property Settings, and we will click on Adwords Link (which is in the Link to other products part):
In this window, we choose the account we want to link:

3- Next we go back to our Google Adwords account, and entering the Account Settings option (wheel at the top right), click on Linked Accounts > Google Analytics.
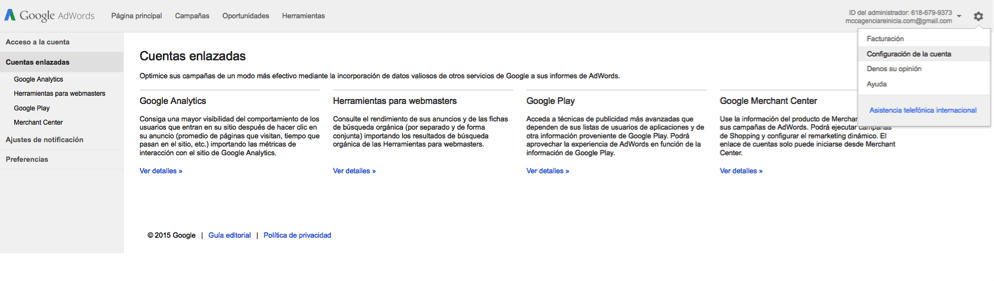
Once inside this panel, click on the Edit link and then choose the Analytics account you want to link:
10. Social configuration
Thanks to the social settings, we will be able to measure the interactions of our users. Thus, with G.A, we will be able to integrate the corporate profiles of our social networks, track interactions (sharing and following) and identify links.
To configure social profiles in Google Analytics and thus be able to better track our actions on social profiles, you must access the Administration panel > Property settings > Social settings:
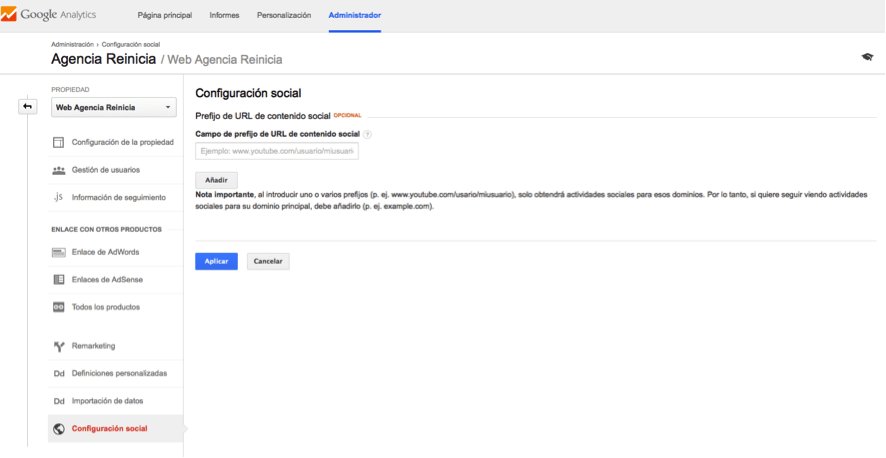
Once here, in the Social Content URL Prefix Field field, simply include the path to the profiles you want to include.
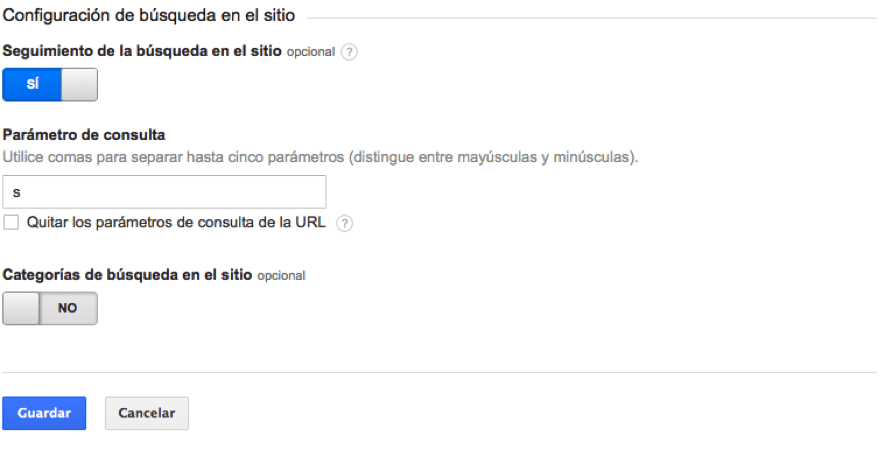
11. Configuration of internal searches
This configuration will help you to track and have data on the queries(search keywords) that users make in the internal search box of our websites, something very useful to know what our users are interested in and create content or sell products / services accordingly; or to know if the information structure of our website is easy for our traffic.
To do this we must first know that every search box on a website generates URLs with parameters. For example, on our Agencia Reinicia website, when we search for “web analytics services”, the following URL is generatedhttps://www.agenciareinicia.com/?s=servicios+de+analatica+web.
In red we mark the parameter that we must take into account when configuring internal searches.
Once we have located the parameter(s), we will go to the Analytics panel at the following path: Administration > View > View configuration
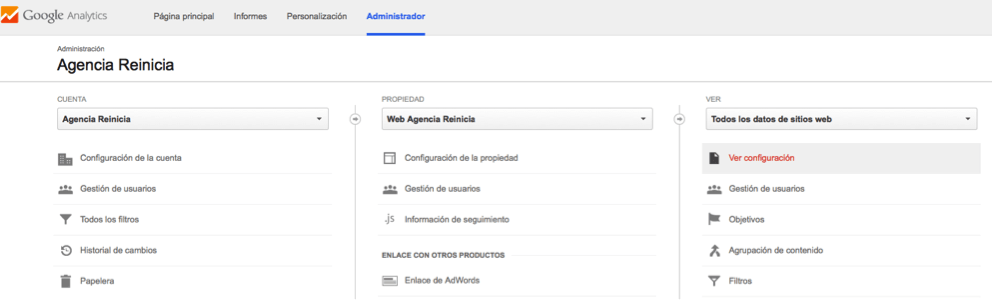
Once inside we will have to activate the Site Search Tracking and fill in the Query Parameter. In our case the parameter will be “s”.